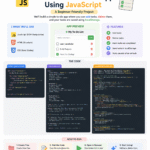
Building a calculator is one of the best beginner projects to understand how real applications work. It helps you learn logic building, event handling, and UI design.
In this guide, you will learn how to create a simple calculator step-by-step.
1. Project Overview
This calculator will allow users to:
- Perform basic operations (+, -, *, /)
- Clear input
- View results instantly
2. UI Design (HTML + CSS)
First, create the structure and design of the calculator.
HTML Components:
- Display screen
- Buttons (numbers & operators)
CSS Styling Tips:
- Use grid layout for buttons
- Add spacing and alignment
- Use colors for better UI
👉 Clean UI improves user experience
3. Logic Building (Core JavaScript)
Logic is the brain of your calculator.
What You Will Do:
- Store user input
- Handle operations (+, -, *, /)
- Calculate results
👉 Example:
- User clicks 2 + 3 → result = 5
4. Event Handling
Event handling allows your calculator to respond to user actions.
What to Handle:
- Button clicks
- Input updates
- Calculate result on “=” click
👉 Use JavaScript event listeners for interaction
5. Display Result
Update the calculator screen dynamically:
- Show numbers as user clicks
- Show final result
6. Add Extra Features (Optional)
- Clear button (C)
- Backspace
- Keyboard input support
Real-World Flow
- User clicks buttons
- Input is stored
- Logic processes operation
- Result is displayed
Why Build This Project?
- Strengthens JavaScript logic
- Improves DOM manipulation skills
- Builds confidence in frontend development
Beginner Recommendation
- Start with basic operations
- Focus on logic first
- Improve UI later
- Practice regularly
Final Thoughts
A calculator project is perfect for beginners to understand how UI, logic, and events work together. It builds a strong foundation in JavaScript development.
At Mango Engineers, we help students build real-world projects to become industry-ready developers.
Call to Action
Start building your calculator project with Mango Engineers and improve your coding skills!