Building a blog website layout is a great frontend project for beginners. It helps you understand layout design, reusable components, and responsive UI.
In this guide, you will learn how to create a basic blog website layout using HTML and CSS.
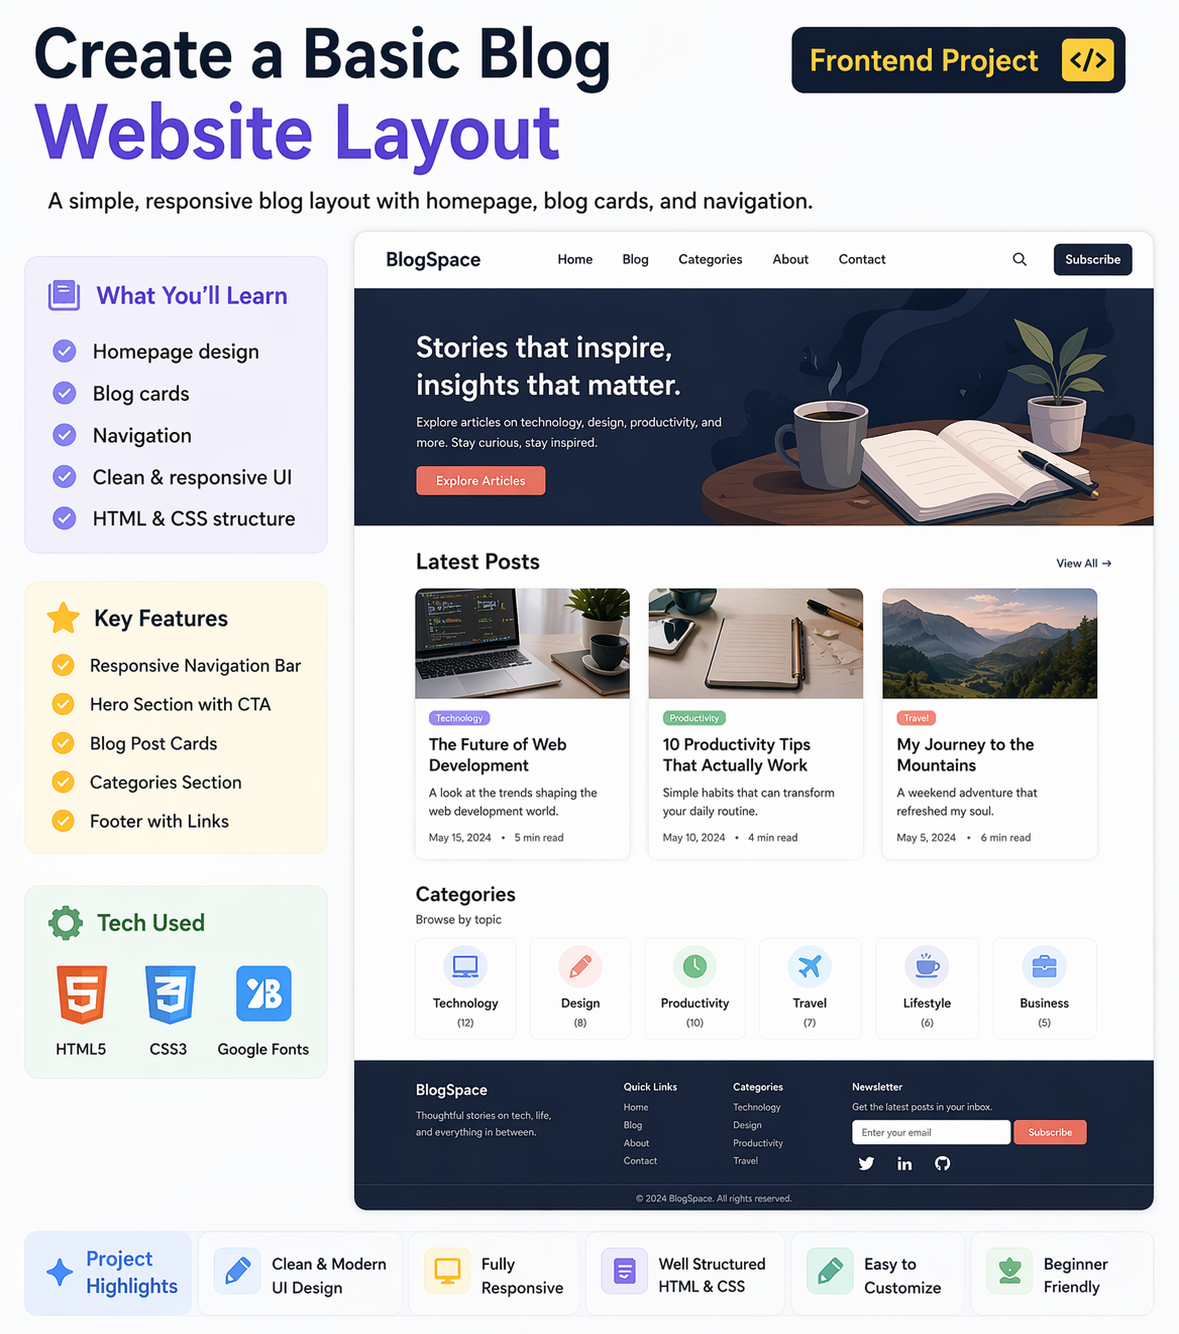
1. Project Overview
This blog website will include:
- Homepage layout
- Blog cards (posts)
- Navigation menu
👉 This is a common structure used in real blog websites
2. Homepage Design
The homepage is the main entry point of your blog.
Sections to Include:
- Header (logo + navigation)
- Hero section (optional)
- Blog posts section
- Footer
👉 Keep the layout clean and simple
3. Navigation Bar
Navigation helps users explore your website.
Include:
- Home
- About
- Blog
- Contact
Tips:
- Keep it fixed or sticky
- Use proper spacing
- Highlight active links
👉 Good navigation improves user experience
4. Blog Cards (Post Design)
Blog cards are used to display posts.
Each Card Should Include:
- Image
- Title
- Short description
- Read More button
Styling Tips:
- Use box shadow
- Add padding
- Keep consistent layout
👉 Blog cards make content visually appealing
5. Layout Design (CSS)
Use CSS for layout and styling.
Techniques:
- Flexbox or Grid for layout
- Responsive design (mobile-friendly)
- Consistent colors and fonts
👉 Responsive design is important for all devices
6. Real-World Flow
- User opens homepage
- Navigation helps explore
- Blog cards show posts
- User clicks to read more
Why Build This Project?
- Learn frontend layout design
- Understand UI structure
- Build portfolio project
Beginner Recommendation
- Start simple layout
- Focus on structure first
- Improve styling gradually
- Make it responsive
Final Thoughts
A blog website layout is a great beginner project to understand real-world UI design. It helps you build strong frontend skills.
At Mango Engineers, we focus on practical learning and real projects to help students become industry-ready developers.
Call to Action
Start building your blog website layout with Mango Engineers and improve your frontend skills!